Customize with the Character Editor
Scene
To start, open the Character Editor scene located in "Assets\2D Customizable Characters\Character Editor\Scenes" and hit
play.

Main Screen

Prefab: The currently selected prefab. Each prefab can have its own settings and customizations, defined in the
CharacterEditorSettings file (see below). You can also remove a prefab from the list. If you remove a prefab by mistake,
you can simply load it again from the file dropdown.
Presets: Contains customization and scaling presets that can be applied to the current prefab.
Sets: Only contains customizations. Applying a set will not clear the character; it will only add what is in the
set. This is ideal for outfit and equipment sets.
Randomize: Randomizes all possible customizations. Note that its randomness may produce a result that might not be
very appealing.
Revert: Reverts to the prefab default.

Body: Color of all the body parts.
Animation: Currently playing animation. You can preview animations by hovering over any of them in the list..
Note
- Some animations, such as Bow Load, are not designed to be looped and may not look good when repeated.
- Some animations are designed for weapons, and others are not. The prefix Weapon indicates an animation that will work well with weapons.
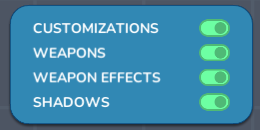
Toggles visibility on and off. This is particularly useful if you want to prevent some elements from being rendered
directly on the sprite sheet when exporting it.

Each customization asset has a few options. Some might not be available if not applicable to the selected asset.
Main: The tint color of the main sprite.
Detail: The tint color of the selected detail sprite.
Index: The current detail index, representing the number of the current detail sprites. The + in the browser
indicates whether an object has detail options.
Tip
The color picker will recommend color swatches. This can be useful to quickly try out some colors and keep them consistent across all characters. You can also add your own color groups and recommendations in the CharacterEditorData asset.
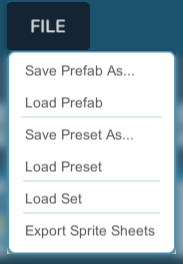
Save Prefab As...: Saves the whole character prefab as a
new Prefab Variant. This is useful if you have a custom prefab;
otherwise, saving to a preset is usually enough.
Load Prefab: Loads and adds a prefab to the prefab dropdown. Loading a prefab will also ask you to select a
CharacterEditorData asset. If you select the wrong asset, you can remove the prefab and reload it or change it directly
in the CharacterEditorData asset.
Save Preset As...: Saves the current customization as a preset.
Load Preset: Loads an existing preset and applies it. Note that it won't be loaded in the next play session. If you
want it to persist, you can add it directly to the CharacterEditorData asset.
Load Set: Loads an existing set and applies it. As with presets, it won't persist in the dropdown menu unless added
directly to the CharacterEditorData asset.

Start test playing the character. This is for demonstration purposes only.
Note
If you're not using the provided character prefabs, note that test playing requires a character controller implementing the ICharacterController interface.
Exporting Sprite Sheets
Exporting your characters to sprite sheets is useful if you want to use them in other engines that don't use Unity
animations.
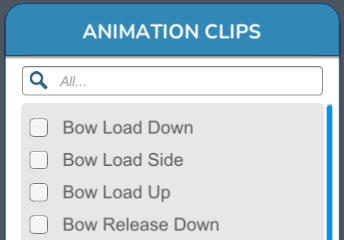
Select the clips you want to be exported as sprite sheets.
Note
Each animation will be exported to its own sprite sheet.
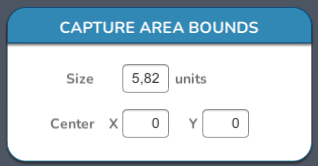
Size: The size of the bounds in Unity units. Not to be confused with pixel size. The bounds are always square and
extend equally from the center.
Center: The position that will be the central point of the frame.
Tip
To keep all character sizes relatively consistent, you can:
- Use the same border size for them all.
- Use the same resolution with the setting set to "Per Unit."
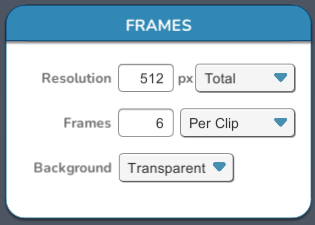
Resolution: The resolution to be used, with the following options:
- Total: Fixes the frame's pixel size to this resolution.
- Per Unit: Multiplies the resolution by the size of the capture area.
Tip
Use Per Unit to easily keep pixel density and relative size consistent between characters.
Frames: Number of frames, with the following options:
- Per Clip: Keeps the frames per animation fixed regardless of animation length.
- Per Second: The number of frames will be a fixed amount per second.
Note
- Using Per Clip won't keep the animation smoothness consistent when clips have a substantial difference in length. E.g., six frames spread out over a 1s clip will look smoother than spread out over a 3s clip
- Using Per Second doesn't ensure that the last frame of an animation will be captured. This could lead to animations not looping well.
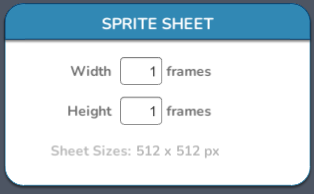
The number of frames that will be on each sheet dimension. If an animation needs more frames, more sheets will
automatically be created while exporting.
Tip
To export single frames, just set width and height as 1.
Settings
Editor settings are adjustable. Please ensure you work on your own copies of assets. This will prevent any update from
overwriting your work.
CharacterEditorSettings: Used by the Character Editor in the scene. Contains the characters that will be loaded. To
load your own settings, just change the reference in the scene hierarchy: Canvas->Character Editor->Character Editor
Manager: Settings
CharacterEditorData: All data needed to load and customize a customizable character.~~~~